pi-top [4] contains some pretty serious engineering. In fact, if you wanted to build something from scratch that has all the features and can do everything a pi-top [4] can do, it’s going to cost you a lot of time and money. But we’ve gone and done it anyway, to show you just how good pi-top [4] is. So our Head of Content, Andrew Webb, rolled up his sleeves, heated up the soldering iron and paid a visit to pi-top’s engineering team.
There are some people out there who don’t quite understand all the amazing things that a pi-top [4] can do. “I can just get a Raspberry Pi 4 for $50 and use that” is an occasional brickbat tossed our way. But there is so much more to the pi-top [4] eco-system than just the Raspberry Pi 4. So we decided to make something equivalent to a pi-top [4] from scratch, just to show how much work went into it and to highlight all of the little tiny details, safety systems, and frankly… engineering chops.
Meet Rez.
Rez is an electronics engineer and one of the engineering team who worked on pi-top [4] for the past 18 months. And so now it’s finished and available to buy, we set Rez a challenge; to accurately build a pi-top [4] using off the shelf parts and components.
It had to have all the things a pi-top [4] has; programmable buttons, a mini screen, and battery power supply to name but a few. Rez was confident it wouldn’t take him very long; that confidence soon began to evaporate as the enormity of what he’d been asked to do sunk in. One thing did quickly emerge, however, and that was a name for this electronic monster… Franken [4].
Let’s go shopping!
The first thing we needed to do was go shopping, so Rez borrowed the company credit and went awol online for a few days. “This is a long stage. I want to measure twice, cut once. I’m very lucky here because I know what to look for in data sheets, but most importantly I already know how the end system should look” says Rez.
However, immediately the costs start creeping up because as Rez puts it, “It’s not always possible to buy the exact number of components I want. Items such as resistors and capacitors will sometimes have a minimum order”.
Also, despite being a fantastic pi-top engineer, Rez readily admitted “I’m definitely going to blow things up. I don’t know how, and I don’t know when, but somewhere along the line, some breakout board will start smoking because of my own error and that board will be destroyed”.
Consequently, he decided to buy backups for critical components. However, for balance, we’ve taken these extra components and minimum order components out of the final price and are just going with the cost of everything used in the actual build.
Despite speaking and reading Chinese, Rez wanted to make the comparison as fair as possible, so he only used sites like Amazon, RS Components and Adafruit rather than say Alibaba. “Adafruit charges a lot for shipping and customs, so these costs also have to be factored in too,” says Rez.
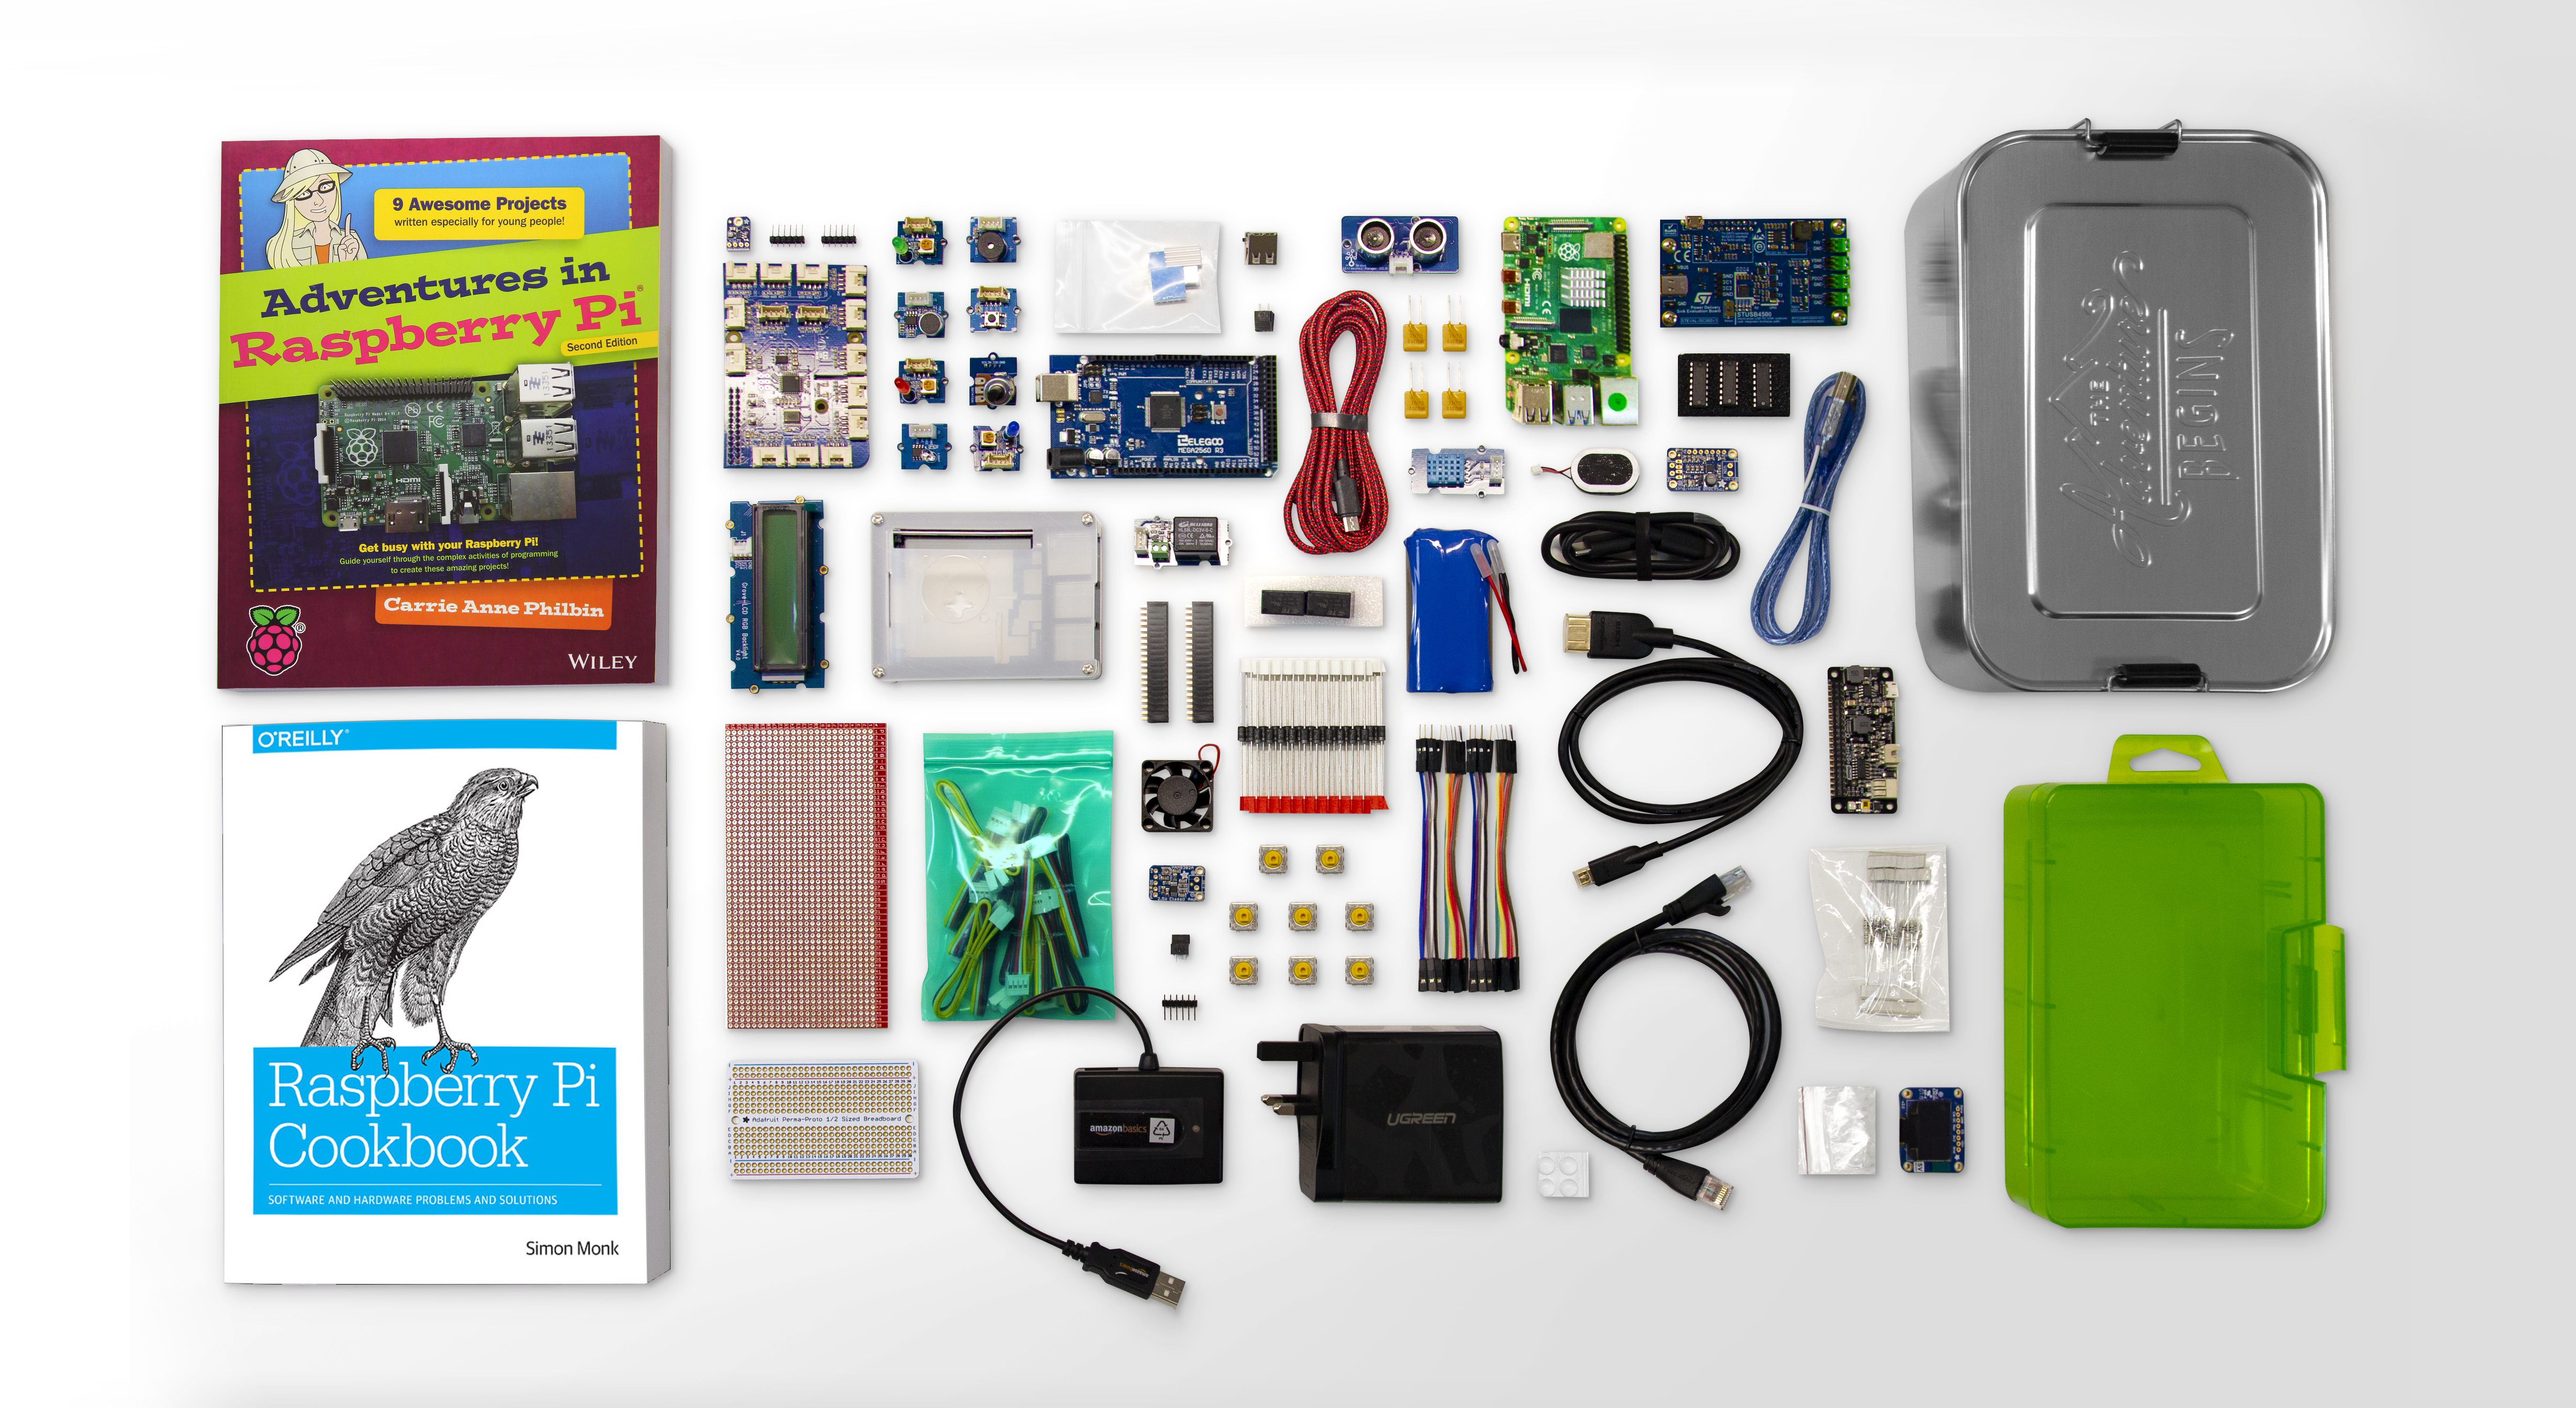
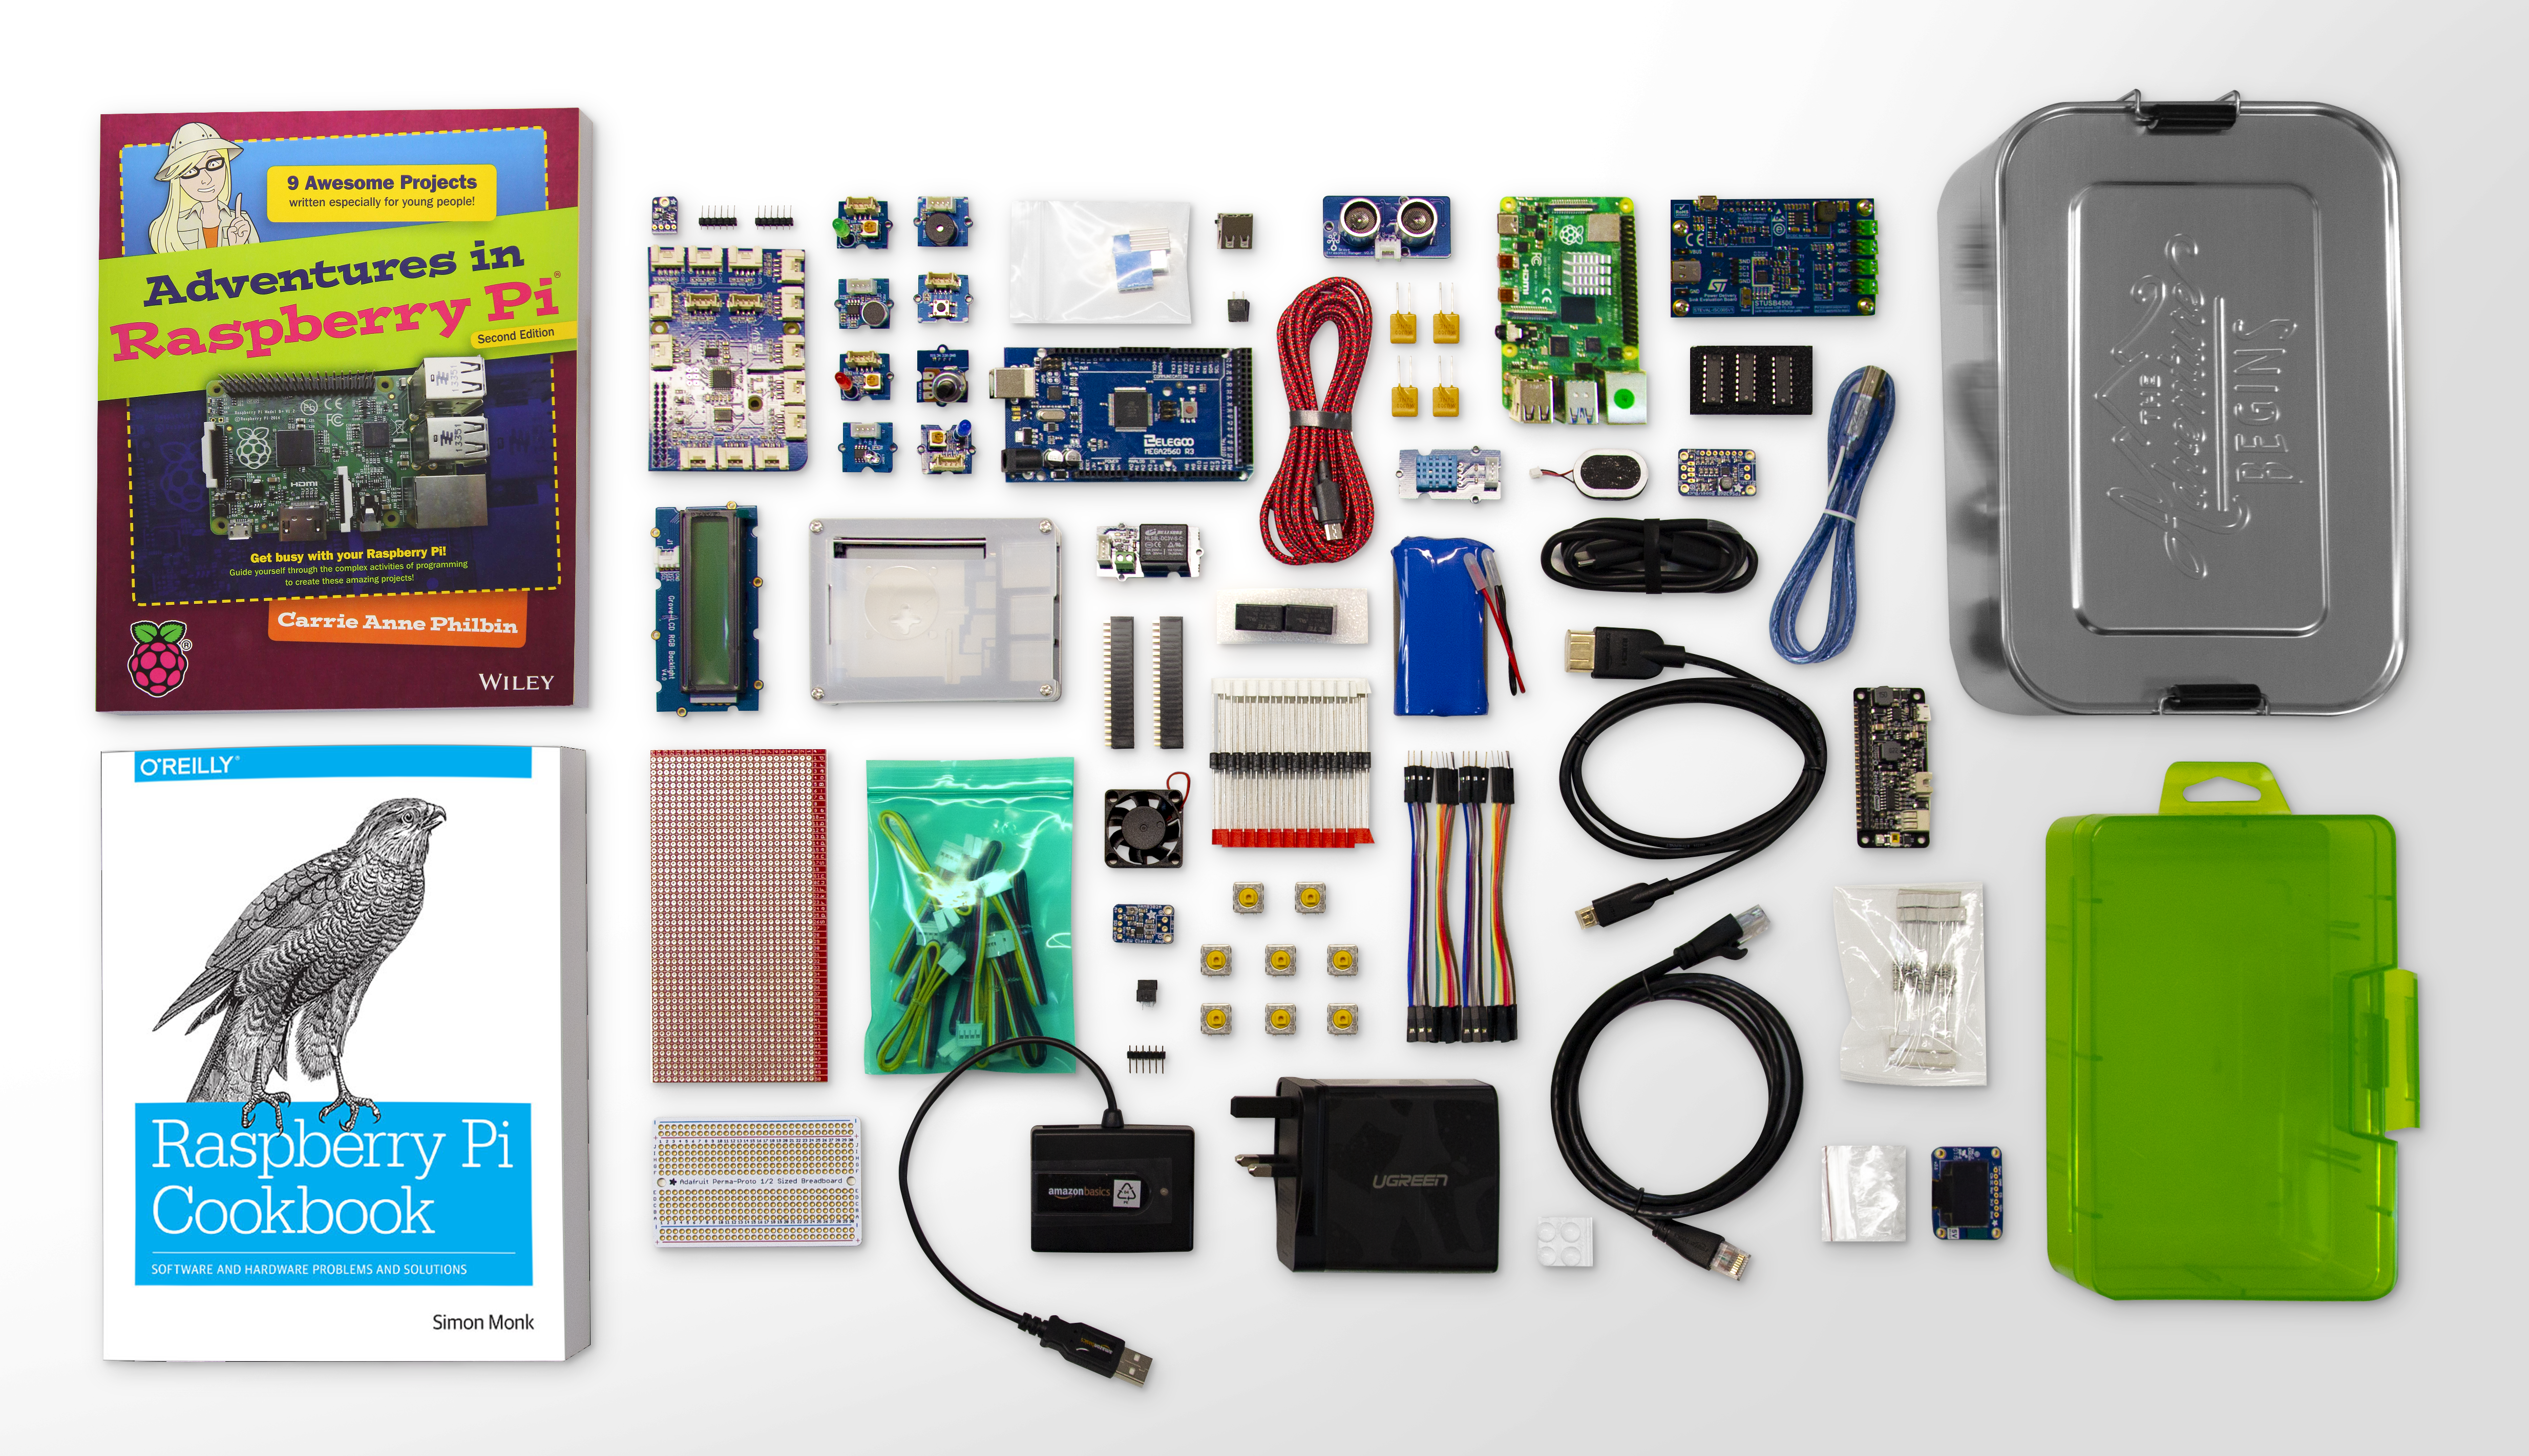
pi-top [4] comes with Further, our online learning platform, so Rez opted a couple of books as the closest substitute. However, they have none of the functionality, interactivity, and integration with Google Classroom that Further has, but back to the engineering…
“Some of the blocks (such as the USBC Evaluation Module (EVM) and Buck Converters) are complex. For the purpose of this project, I’m assuming the users do not have enough skill nor the software to design four-layer PCBs. As a result, everything will first be breadboarded and then soldered to veroboards or stripboard” says Rez.
If you wanted to build a pi-top [4] yourself it’s going to cost you over $500
Like all modern, future-proof computers, pi-top [4] is charged by USB-C. “USB-C Power delivery is still novel and complex tech so I can only purchase the evaluation module as the closest equivalent part, as there aren’t breakout boards available on Adafruit etc. On a positive note, this part also has its own on-board 5V buck converter. This means I can use this as my 5V persistent, which is for the power rail that I need on the Micro Controller Unit (MCU) even when the Pi is turned off”.
Over the next few days, Rez’s shopping starts arriving, and the startling news is that if you wanted to build a pi-top [4] yourself it’s going to cost you £428.90 / $553.71 (Rez shopped from the UK, US amount correct at the time of writing). If you’d like to see all the complete shopping list the Google Sheet complete with buying links is here http://bit.ly/Franken4, and just for comparison, pi-top [4] starts at $299.
![Buy pi-top [4]](https://no-cache.hubspot.com/cta/default/4368942/75f442f9-80b7-4cff-8912-645564fd881b.png)
Building Franken [4]
Rez then set up his laboratory and under the cover of darkness, began testing his components. Here are his notes:-
Day 1:
Assembled the Raspberry Pi into its case and tested the current draw of the fan. It doesn’t have PWM control so it will draw a constant current from the RPI on the 5 Volts pins.
I’ve connected the Power Blocks to a Desktop Power Supply to check what inputs they can take in as well as the Voltage levels they’re giving out. Voltage levels of the 5V Buck and the 3V3 Buck are slightly higher than expected, but this is good because there will be minor voltage drops across the system until it reaches the outputs. As long as the voltage that the user sees is the one they’re expecting, this is fine. Most of my time here was spent just soldering thick gauge wire.
OLED mini screen works fine with the Arduino, tested this with example code found in the Arduino IDE. I’m going to assume that the OLED will work fine with the Raspberry Pi as well.
Day 2:
The USBC module works fine, and can be programmed relatively easily, the problem is the controller works better with an STM microcontroller so I will replace my Arduino with that instead. Such a bother. Now have to retest my OLED display with the STM and repeat work.
Day 3:
Soldering ESD diodes and GPIOs to a veroboard. This has taken far longer than intended; a total of 4 hours. Broke one of the 3V3 Buck converters, so switched to my backup.
Day 4 and 5:
Soldering the facade. The user buttons are soldered up with pull up resistors next to the status LEDs (for charging and power status, like pi-top [4] has). The longest part of this was soldering up the multiplexers. One of the multiplexers was somehow destroyed when I tried to turn it on, which meant removing that one and soldering it all up again. Total of 8 hours.
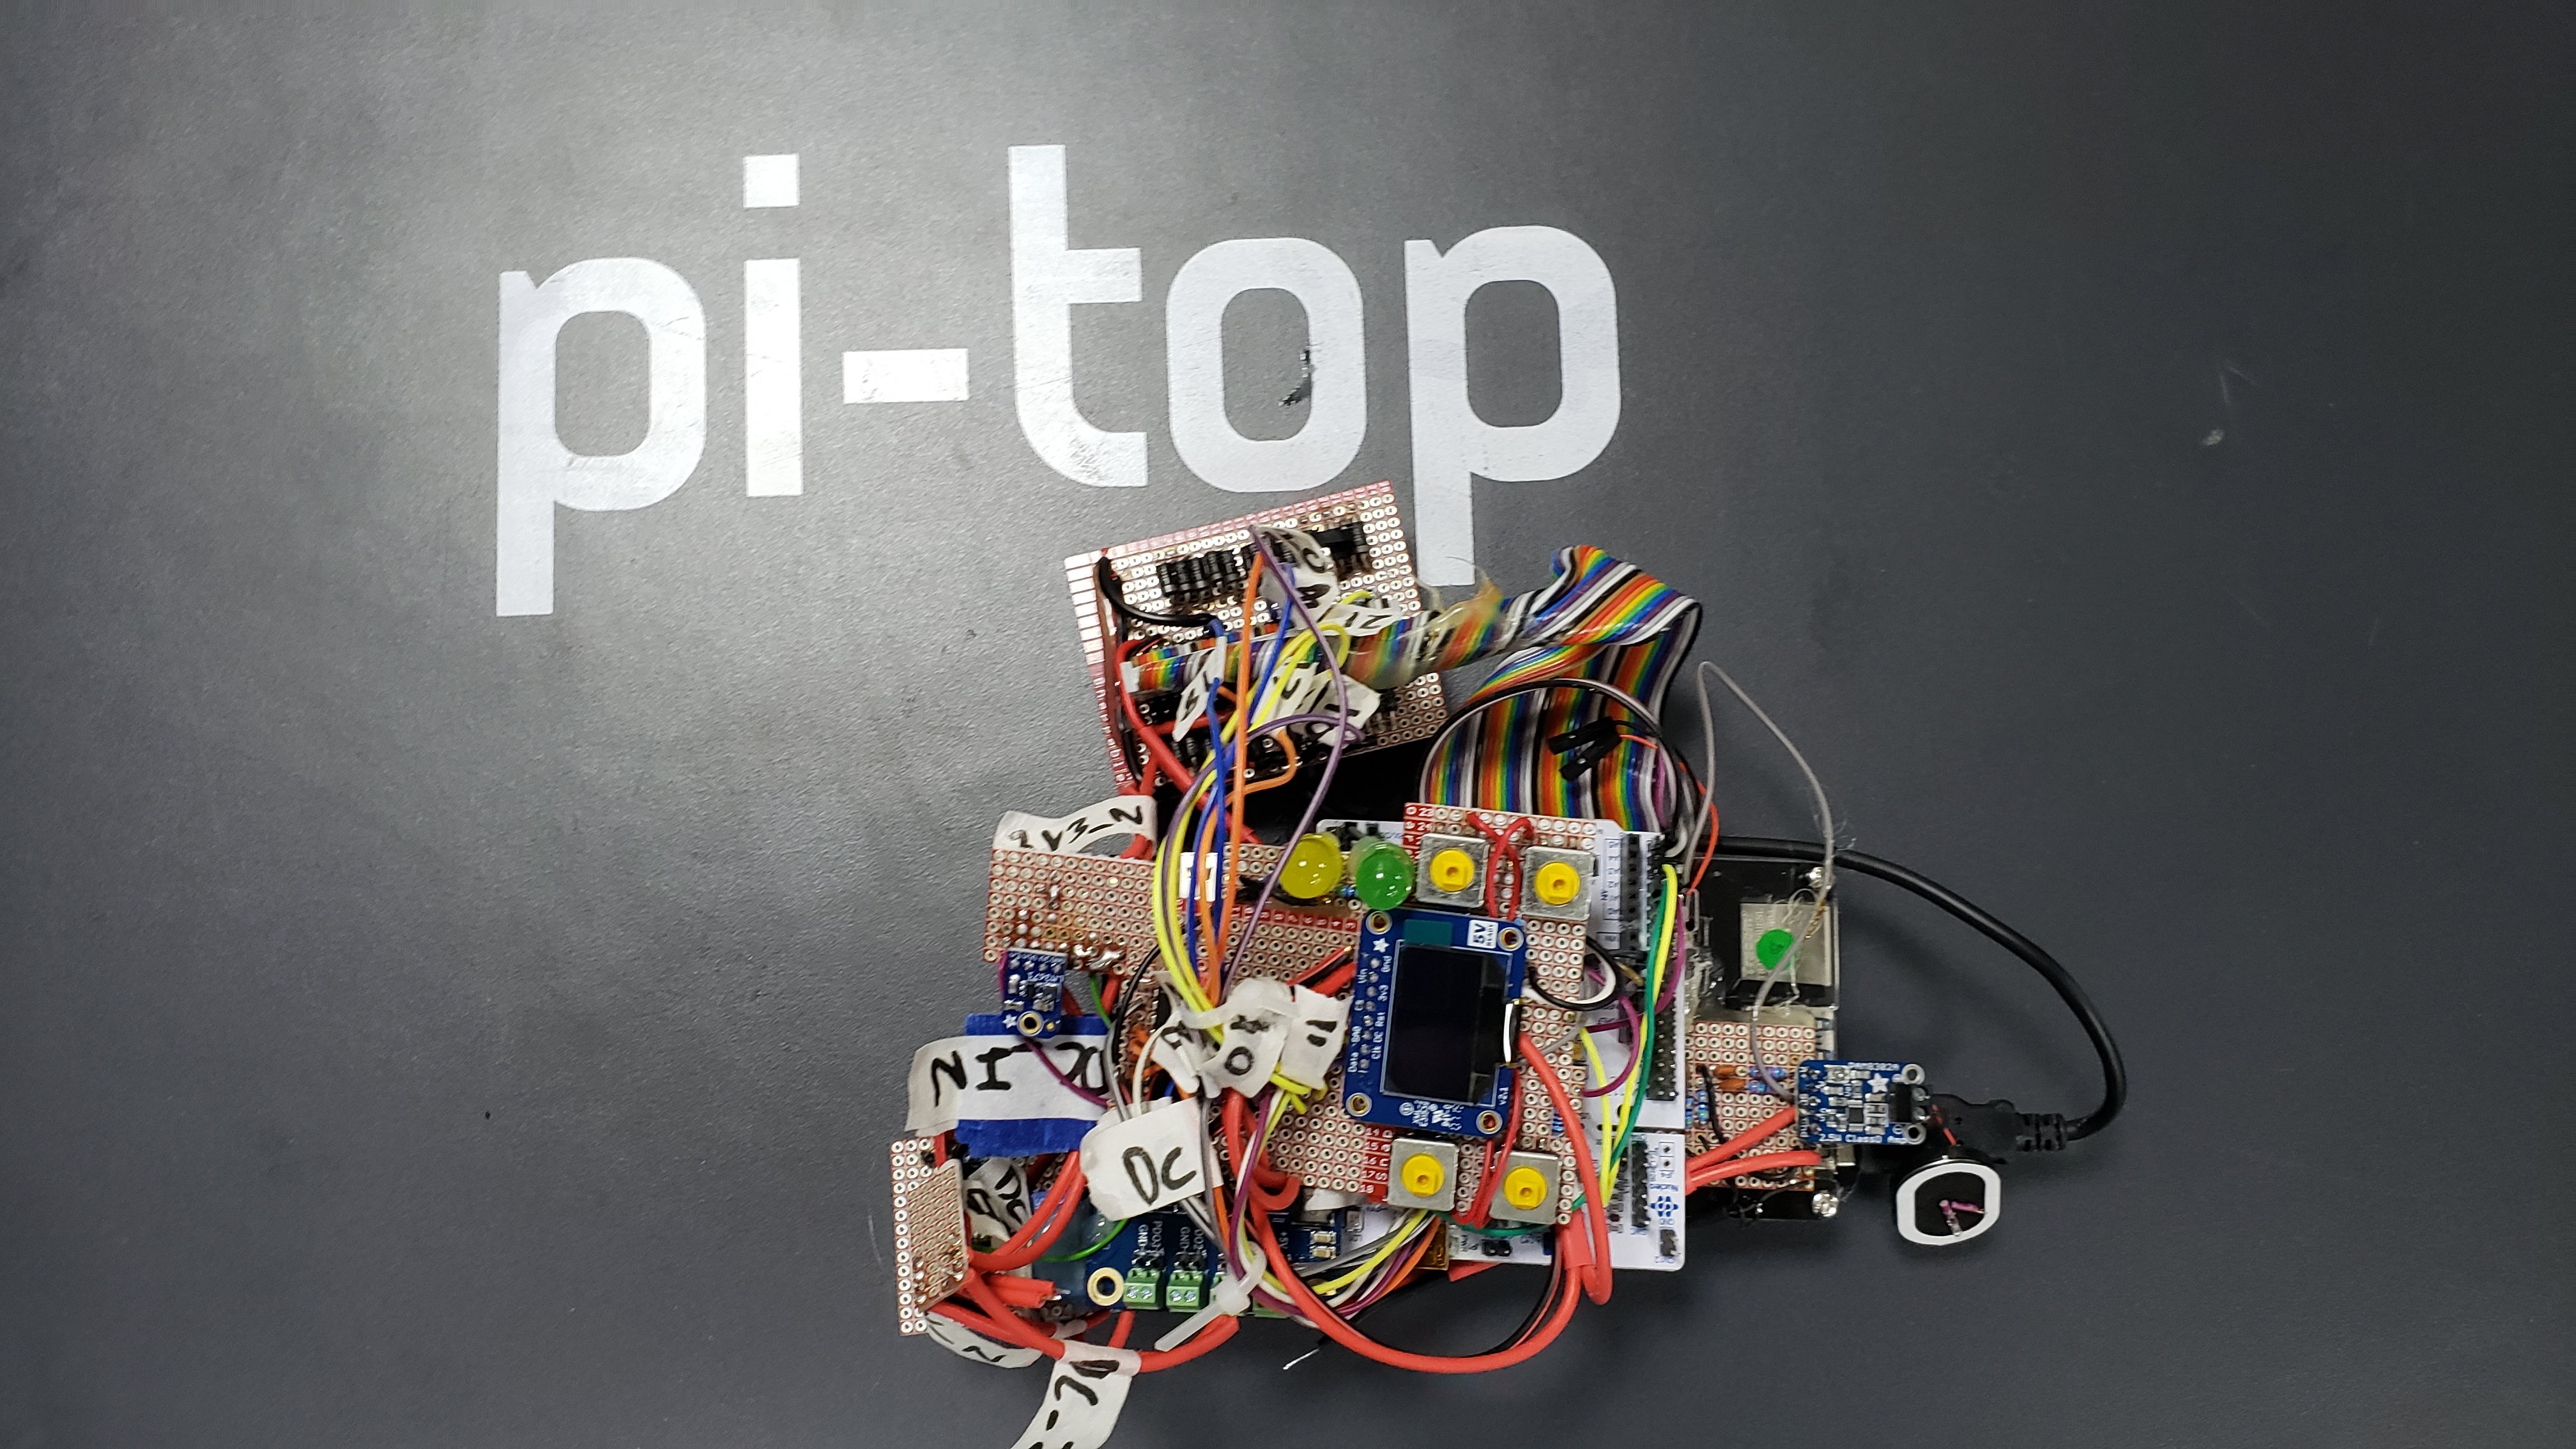
It lives!
In all, it’s taken Rez, a highly qualified engineer and someone familiar with pi-top [4]s systems and structure, over 59 hours to build… THIS!

What makes pi-top [4] unique?
I’m sure you agree, Franken [4] isn’t a looker, it’s probably not even practical to use. You certainly couldn’t stick it in a tree to record animal movements or attach it as the brain of a rover. And it wouldn’t last five seconds in a classroom or club full of curious teenagers.
Yes, pi-top [4] is powered by a Raspberry Pi 4, but there’s a whole lot more happening under the hood in our little grey inventing machine. And now you can see it laid out we hope you can appreciate some of the things we’ve done so you can get on with making something amazing, rather than wrestling with technology. So here are just some of the cool engineering benefits of pi-top [4] you might not know about, written in more human terms.
- Electrostatic discharge protection (ESD): we’ve spent enough time in schools, libraries, and clubs to know that many of them have hard wearing nylon carpet tiles on the floor. Great for the janitor to keep the place clean but they can easily build up a static charge on shuffling kids’ feet. So we added ESD to pi-top [4] to not only reduce damage to the product but also to keep students safe as much as possible.
- Power ORing: this switches between the DC power from the wall and battery power. The upshot is you can unplug your pi-top [4], deploy on a rover or place in a tree and do your projects, and then quickly and seamlessly bring it back inside and connect to the mains power without the need to reboot. And while we’re on the subject of power, pi-top [4] has a battery fuel gauge – a chip that tells you the accurate percentage of the battery, like in your cell phone. All battery packs degrade over their life and this chip does learning cycles, so each time your pack discharges and charges, the capacity gets a little smaller but our fuel gauge keeps track of this and updates the values every time.
- The mini screen: unlike Franken [4], pi-top [4]s mini screen can be used even when the Raspberry Pi is switched off! This is great for telling you how much battery life is in the unit, as well as other things like settings and system information. There’s even a secret Easter egg in there ;-)
- Poly fuses: there are lots of possible uses for pi-top [4] from power-hungry processing to driving motors. These fuses act like a regular breaker switch, so if there’s too much current, it cuts off the power. Unlike say a domestic fuse in a UK plug, poly fuses are able to reset themselves, so you can carry on working.
- Heat sink: it’s a known fact that under pretty much any common use the Raspberry Pi 4 generates a lot of heat. To protect itself the RPI 4 has something called ‘thermal throttling’ - essentially slowing down the processor to reduce heat - which happens all the time... We don’t think you should slow down, so pi-top [4] has an active cooling system that keeps the RPi 4 cool even under demanding tasks. Not only that, you can even overclock the CPU from 1.5Ghz to faster 1.75Ghz. You can read more about pi-top [4] active cooling system here.
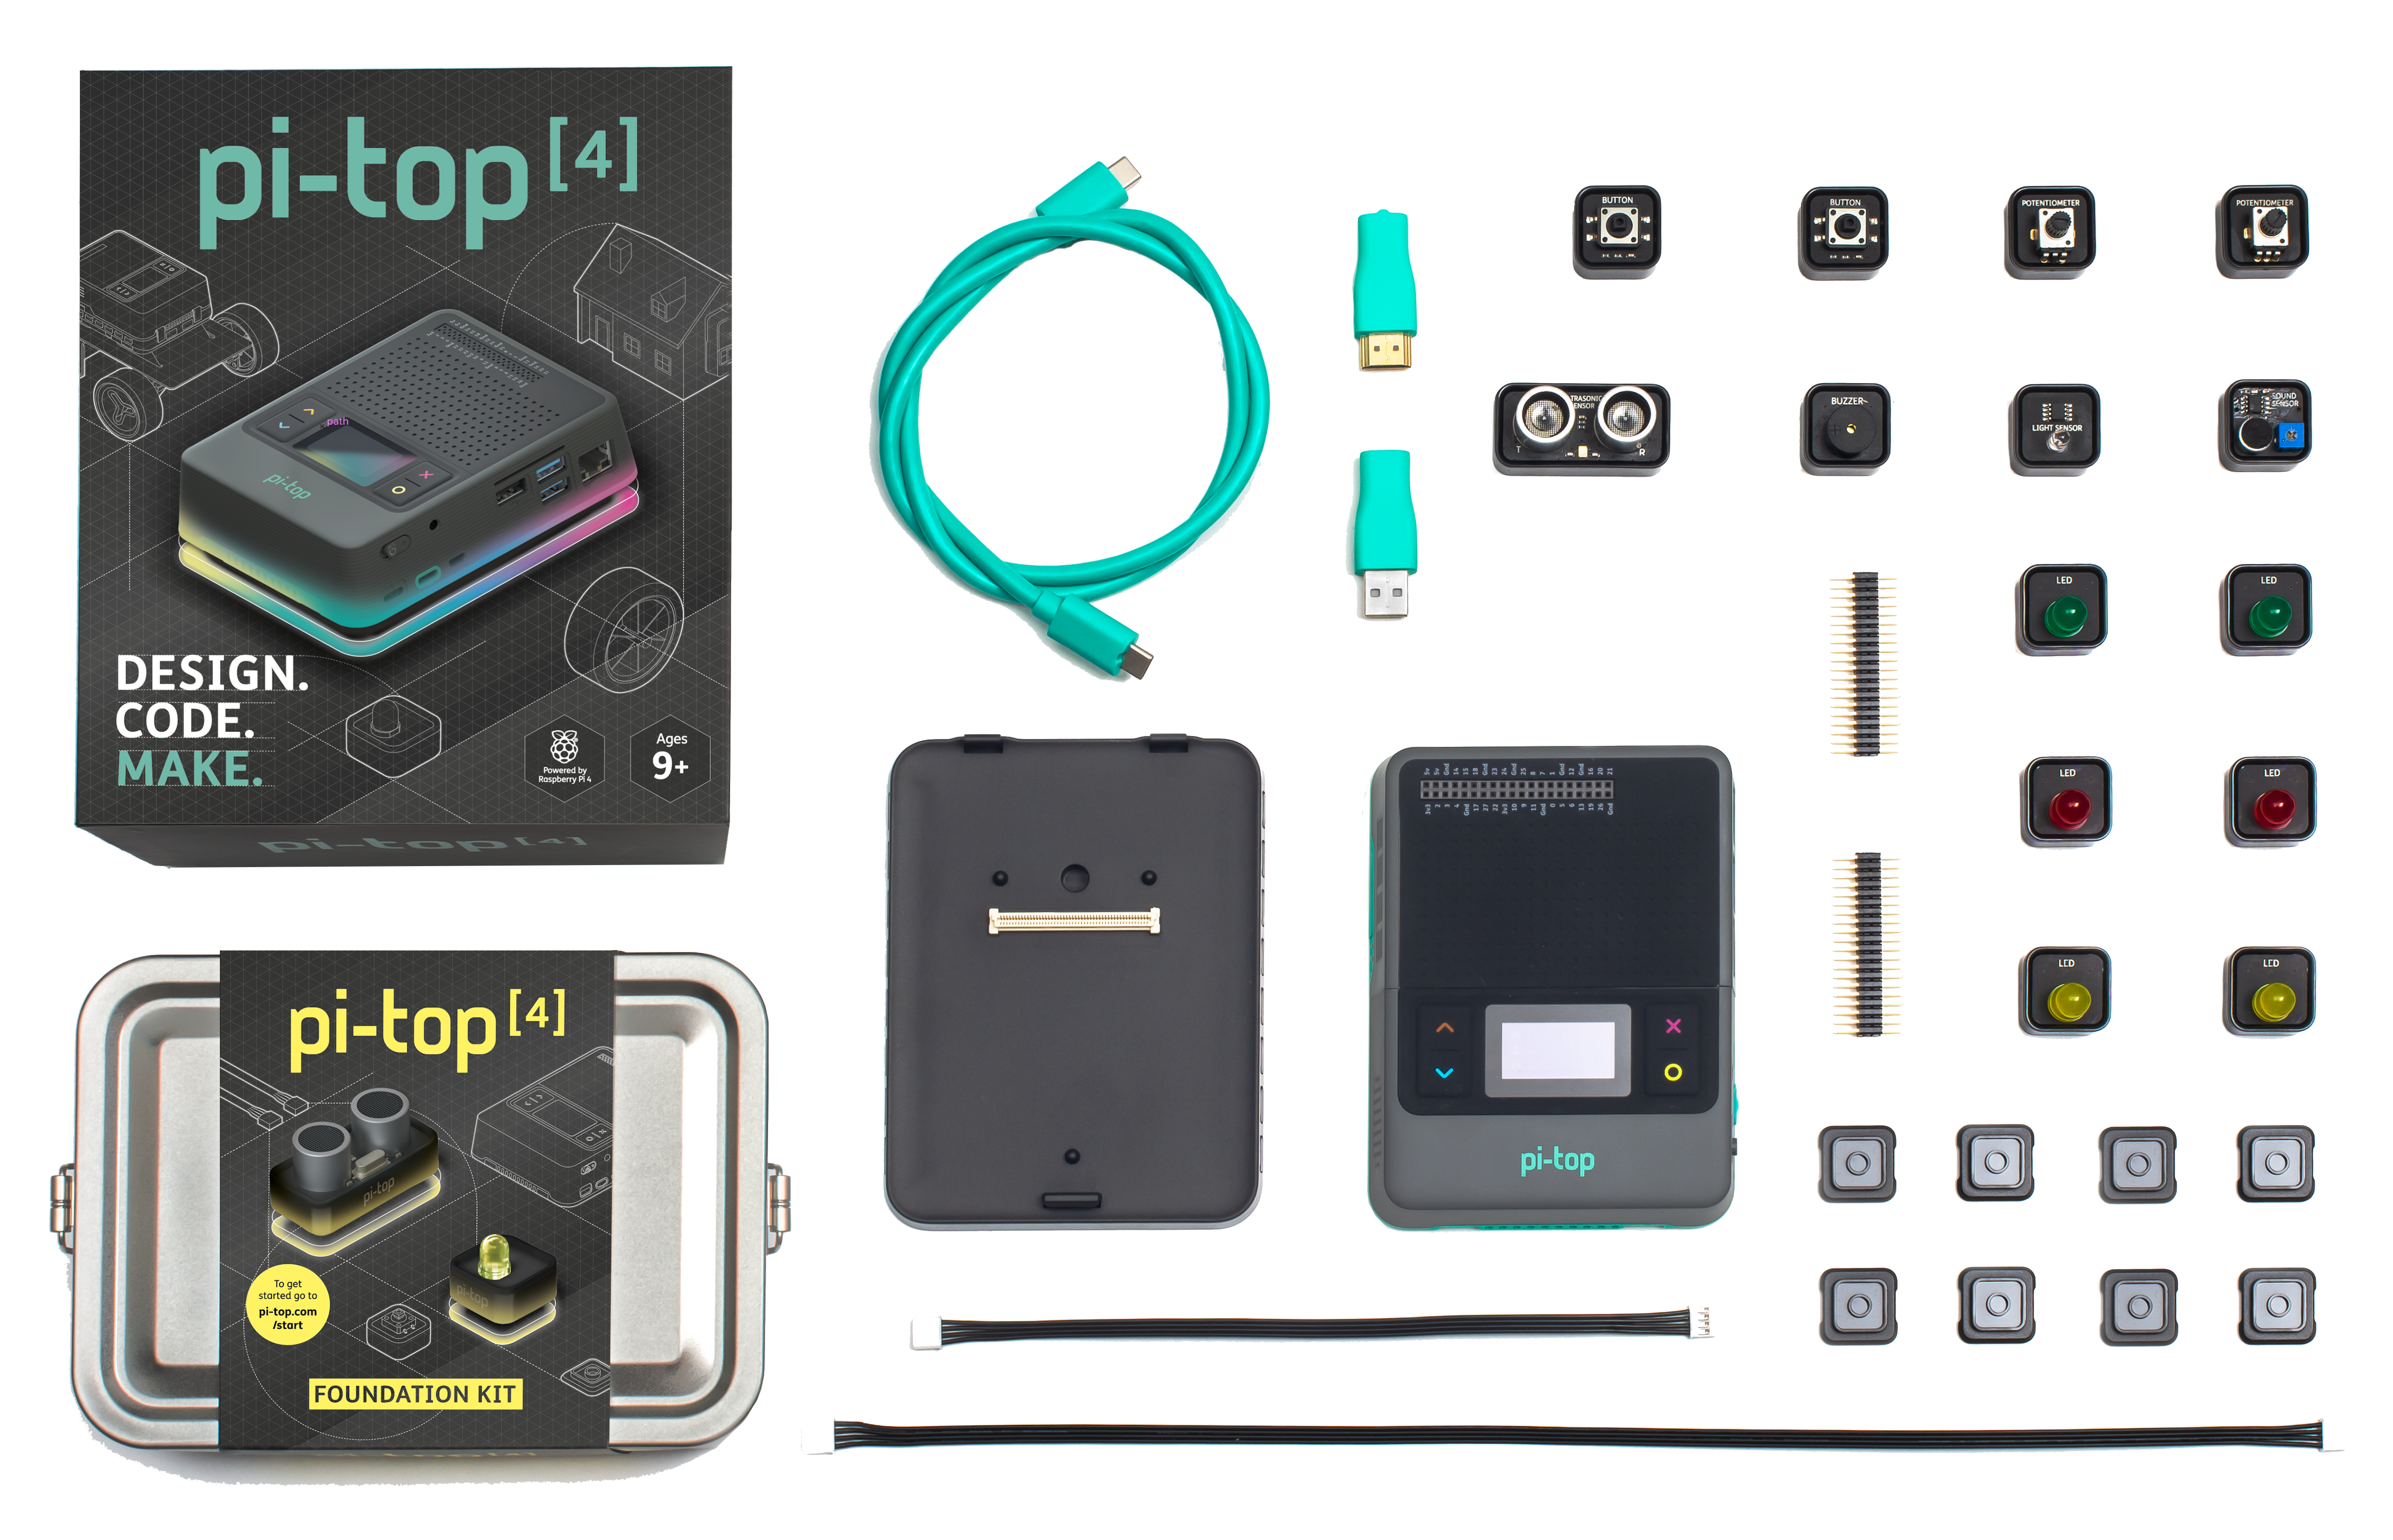
Solid Foundation
So far we’ve talked mainly about the pi-top [4], but it’s worth remembering that every pi-top [4] comes with the awesome Foundation Kit, a ‘bento box’ of electronic components that let you start your making journey. The nearest equivalent selected by Rez was Seeed Studio GrovePi+ Raspberry Pi SBC Starter Kit (£85.79), which has none of the rugged, durable design of our components and also lacks the magnetic and LEGO connectors.
Take it Further
So there you go, Rez and I hope you’ve enjoyed seeing some of the amazing and often unsung engineering skills we’ve put into pi-top [4]. And remember, this is all in addition to the amazing components, LEDs and sensors included in the Foundation Kit that also come with the pi-top [4] as well as our online learning platform, Further.
We believe the pi-top [4] eco-system and product range is the best machine for designing, coding and making anything. And for those of you who do like to build your own systems from scratch, we’re cool with that too. In fact, you could even use this project as a lesson idea, and have a class try and make their own computer from scratch.
At pi-top, we’re all about inspiring and helping anyone to invent anything. So if you’d like to find out more about how pi-top [4], the Foundation Kit, and Further, can help your school, community group or club, get in touch and let’s talk.
As for Franken [4], it has found another calling… as a doorstop and an ode to Rez and his engineering chops. So now you know as with many 'simple things' - there is a huge amount of complexity under the hood! So much goes into products ready for real classroom use and we are glad to take you through all that is in pi-top [4].