It is possible to connect pi-top [3] & [4] computers to WPA2 Enterprise networks and this document gives some example configurations. There are a variety of ways that organisations can choose to implement WPA2 enterprise authentication including:
- PEAP
- TTLS
- TLS
This document does not cover that network configuration, only how to connect devices to each type. You will need information about your WPA Enterprise network setup to complete the required configuration.
This guide will show how to use the wpa_gui application to make configuration changes, as an alternative to editing the config file directly, but the required parameters are the same.
To configure Wi-Fi you will first need to get access to your pi-top's desktop environment. You can do this by plugging in a screen and keyboard, or by connecting via VNC using one of the alternate connection methods in the final section of this guide.
wpa_gui is a graphical application for advanced network configuration, but we will have to use the Terminal application (available in the desktop start bar) to run it.
To check if it’s already installed, open your terminal and enter the command to start it:
sudo wpa_gui
If this opens the application window, you can skip to the Wi-Fi configuration section which applies to you.
If instead you get a response such as command not found, proceed with the installation guide.
To install wpa_gui:
Start your pi-top and make sure you have an internet connection (use a wired connection if you can’t access Wi-Fi).
Find “Preferences > Add/remove software” in the start menu
Enter wpagui (no underscore).
Wait for the software to be installed.
Once wpa_gui is installed, open a Terminal window again and run the start command:
sudo wpa_gui
This will launch the application window.
In the wpa_gui window, select your "Adapter" (normally wlan0) and then click on the “Manage Networks” tab. Finally, click "Add" to bring up the dialog to configure a new network:
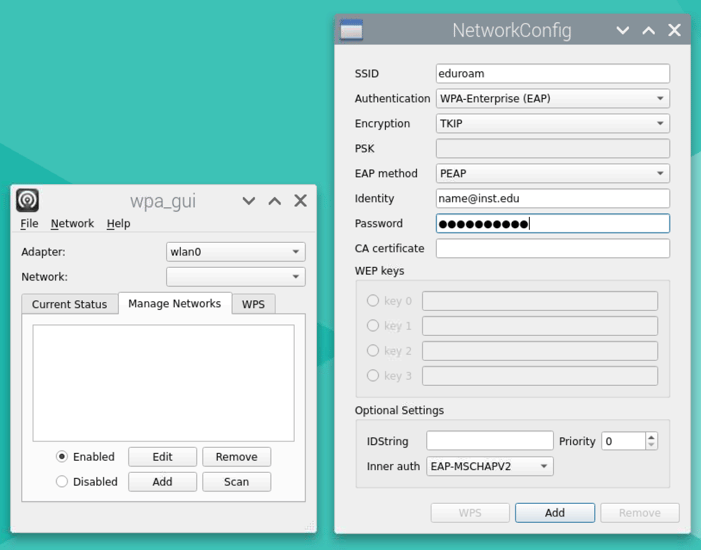
At this point you need to understand your WPA setup (your administrator should be able to help with this).
In the image above I’ve selected a common simple setup that may work for you.
For identity you need to enter the username that’s been configured to allow the pi-top to connect to the network.
Then enter the related password.
When you have entered all the configuration for your particular network, click “Add”
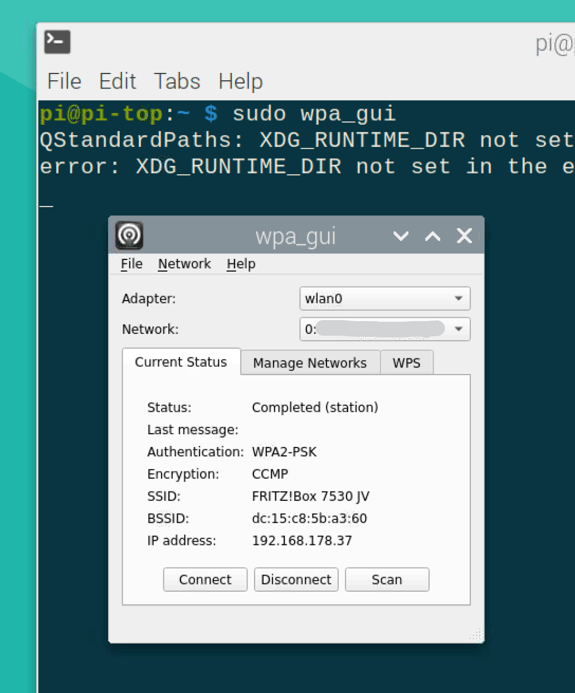
Return to the first window, select the “Current Status” tab and then click “Connect”
If your network settings are correct, you should see a valid IP address and the wifi widgit in the bottom right corner of the screen will show as “connected”.
If the connection was not successful you may need to make a small configuration change, which will require a reboot. Run the following command in a new Terminal:
echo -e "interface wlan0\nenv wpa_supplicant_driver=wext,nl80211" | sudo tee -a /etc/dhcpcd.conf
And now restart your pi-top. After it restarts, it should automatically connect to the network you configured.