The first step to using Further is to set up an account. All users can do this in the same way, whether they are a teacher or a student- by clicking the “Sign Up” link the top right corner of the homepage. The Sign-Up page gives users the options to create an account using their email address, log in with Google single-sign-on, or with Clever.

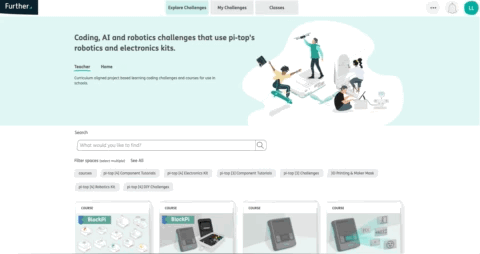
Once you have an account on Further, you can start using the challenges we’ve provided, or even create your own. If you want access to classroom management and content authoring, you’ll need to set up a teacher account. To do this, click on the Classes tab in the middle of the navigation bar at the top of the page. At the bottom right of the Classes page, you’ll see a link labelled “Become a Teacher.”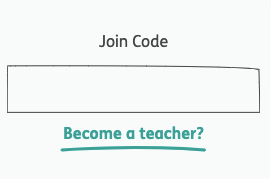
When you click on the “Become a Teacher” link, you’ll be prompted to start a 30-day free trial or to enter a membership code. This code is provided with the purchase of a Further license.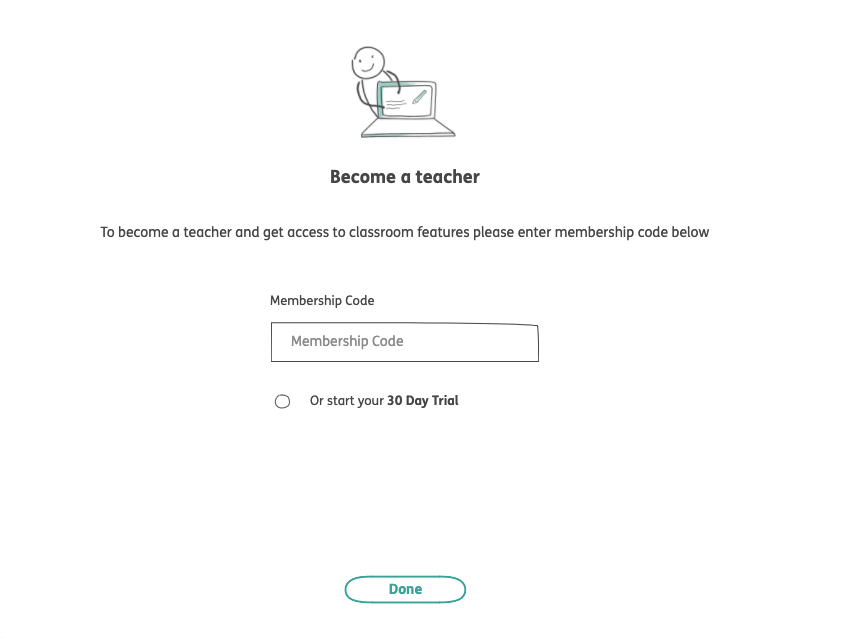
You may instead have been provided with a membership code activation link, which you can use to jump straight to this dialog and have the code prefilled.
If you don’t have your membership code, contact your pi-top sales representative or reach out to us at support@pi-top.com. We encourage you to use the 30-day free trial until you receive your code.
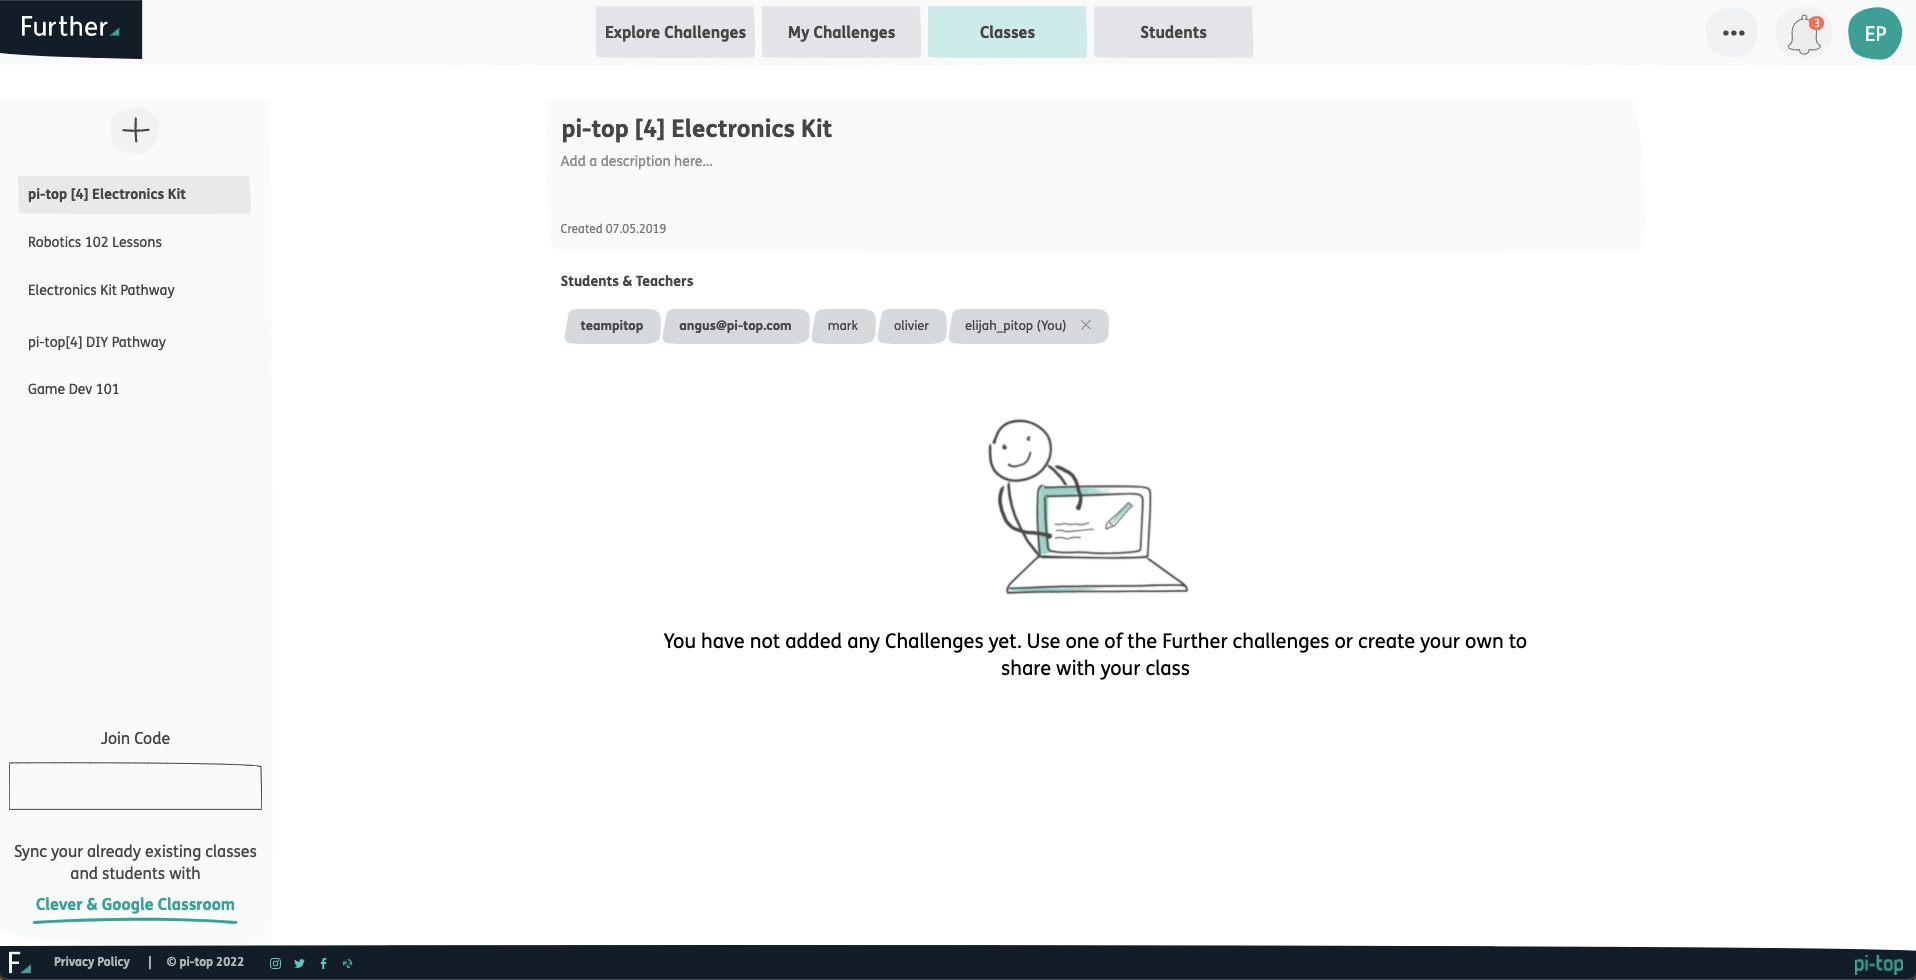
Once an account has teacher access, it has the ability to create classes inside of Further. Classes is a space where you can add students and assign specific content to them. When students work on the challenges or tutorials you've assigned, you'll be able to see their individual (or group) submissions. Let's learn about setting up your first class.
- Creating a class
To create a class, click on the Classes tab at the top of the page. On the left hand side of the page, you’ll see a “+” inside of a grey circle button. Clicking on the “+” will get you started creating your first class.
-
- Adding a title
For a class to be created it first needs a title. When thinking of a name, consider who you will be assigning the specific lessons to and how you would like to manage your students or student groups. Remember, the "class" is what the students will join to receive their assignments. Once you have entered the title, click "Create". Note: If the name of the class ever needs to be modified, you have the ability to edit it at any time.
- Adding a description
After you have clicked "create" you will be brought to the general page for the class. This is the place where you will add students to the class and find the content assigned to them. You can also include more details on this page, such as a class description or even a cover image.
When you add students to the the class, they’ll be able to access it whenever they are logged in to Further. It will be found in the Class tab at the top of the Further window. They’ll see it in the left-hand list, just like you do. Any student enrolled in this specific class will be able to see the challenges you assign here.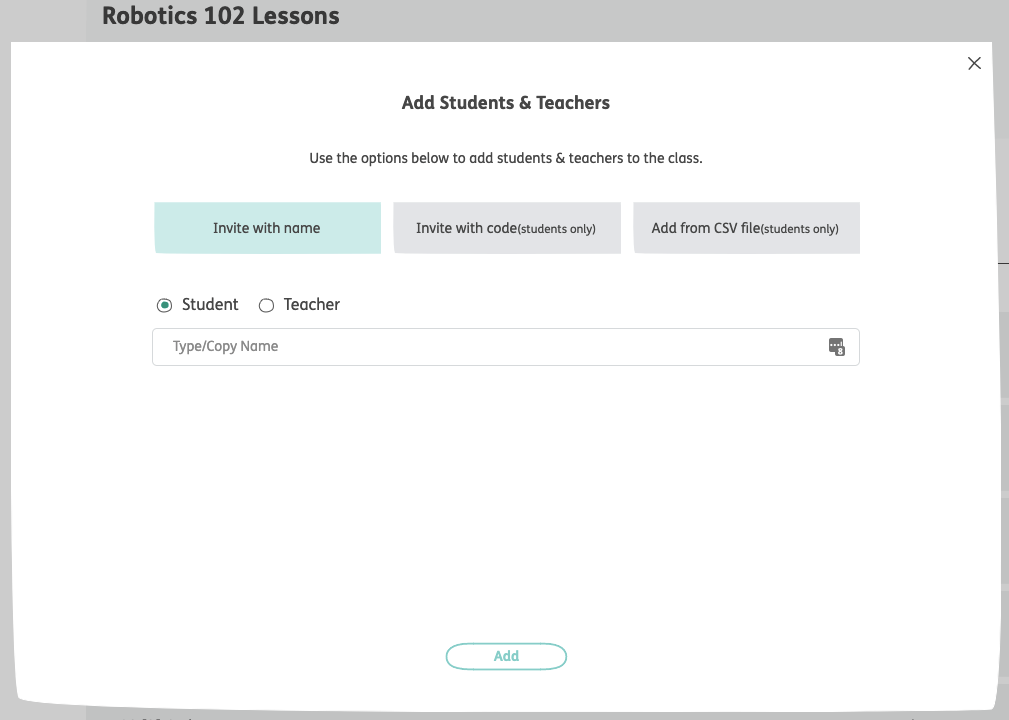
To add students, you have a few options: manual invitation, a class code, or a csv import.
- Class code
- When you select the “Class Code” option, a random code is generated. Students will type in that code to self-enroll in the class. You can choose how long the code will last before it expires. Once a code expires, you can generate a new one to add more students, if you’d like. Note: This does not affect their enrollment in the class nor put an expiration date on the lessons.
- Manually adding
- If students already have a Further account, you can also manually add them to your class. To do this, you will need to know their username. (It is typically the email address that they use to log in to Further.) Select “Invite with name”, check the student option, and then type in their username.
- CSV importing
- Lastly, you can import a whole list of students using a CSV spreadsheet. This method is used when students have not already created Further accounts, and you want to add them all at once. (This is a great way to get things set up before the beginning of the school term.)
For this method you will create and import a CSV file that consists of two columns. The first column should contain all of the student's names, and the second column will hold their corresponding email addresses.
CSV files can be created in Excel, Google Sheets, or any other CSV editor. To save time you can copy and paste the information from a pre-existing spreadsheet or a even a digital roster saved on to your computer.
Save the CSV to your computer and upload it to Further by clicking the “+” button. Your students will all be given new accounts, and passwords will be generated for them to log in with.
- Lastly, you can import a whole list of students using a CSV spreadsheet. This method is used when students have not already created Further accounts, and you want to add them all at once. (This is a great way to get things set up before the beginning of the school term.)