A class can not function unless it contains work for students to complete. As a teacher, you are able to add content created by pi-top from Further and add lessons that you create yourself. The pi-top content consists of tutorials, challenges, and courses; all of which can be assigned to any class. Below you will find more information about this and how you can create lessons yourself.
- Pi-top content
- Our content is broken down into two types: Challenges and tutorials. The format of these are different: Challenges are larger projects with multiple steps. Tutorials are smaller bits of instruction detailing how to perform a specific task or use a specific tool. Functionally, they behave the same when you are adding them to classes.
Adding pi-top challenges and tutorials to your classes is easy. Once you’ve created a class, simply navigate to the main page of Further by clicking the Explore tab at the top of the Further window. (Or you can click the Further logo in the top right corner of the page.) Look through the list and select a challenge you would like to use. You can filter the content by clicking on the options listed under the search bar.
The only challenges that will be visible will be the ones matched to the filter that is selected. You can change the filters by clicking on them. The list of filters is beneath the search bar near the top of the page.
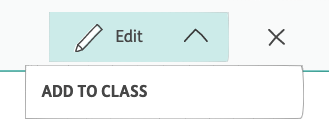
Click on the challenge you want to add. This will open the challenge. Near the near the top of the Further window, find the icon marked with three stacked lines. Click on it to access more tools. Choose the "Add to Class" option and then pick the class that you would like to assign the lesson to. If you’ve only made one class, clicking on this will add it to that class. If you’ve created more than one class, a pop-up dialogue box will appear, asking you to select a class. To finish the process, click “Add” and you will be brought to the class page. If the challenge doesn’t show up the next time you view the class page, try logging out and logging back into your account, or simply refreshing the page.
- Our content is broken down into two types: Challenges and tutorials. The format of these are different: Challenges are larger projects with multiple steps. Tutorials are smaller bits of instruction detailing how to perform a specific task or use a specific tool. Functionally, they behave the same when you are adding them to classes.
- Your original content
- Adding your own original content to a class is as easy as adding pi-top content. Whenever you create new content on Further that content gets stored in the My Challenges section. This also applies when you make a copy of any pi-top content so that you can edit it. Click the “My Challenges” tab and find the content you want to add to your class. After that, the process is the exact same as adding our content from the Explore page to your class: Click on the content you want to add, and once you are inside the lesson, click the three line icon and select “Add to Class”.
- Adding your own original content to a class is as easy as adding pi-top content. Whenever you create new content on Further that content gets stored in the My Challenges section. This also applies when you make a copy of any pi-top content so that you can edit it. Click the “My Challenges” tab and find the content you want to add to your class. After that, the process is the exact same as adding our content from the Explore page to your class: Click on the content you want to add, and once you are inside the lesson, click the three line icon and select “Add to Class”.
- Courses
- In addition to adding tutorials and challenges, teachers can assign whole courses to a class for students to complete. Adding a course to a class is the same process as adding a challenge. Navigate to the course on the Explore page (if it is ours) or the My Challenges page (if it is yours) and open the course. Next, choose the class you would like to assign the course to. Please note that Every challenge included in the course will be added to the class in the order it appears.
Now that you have created a class, let’s look at the dynamics of it. When students open the class page, they are presented with a list of the content you’ve assigned to them. Clicking on the word “Start” or “Continue” will take them into the lesson. Once start is clicked, it creates a “submission” for their assignment.
A submission is a student’s copy of the lesson, with any work they do as they progress through the lesson. Think of it as their copy of a worksheet. A separate submission will be created for each student, or student group.
Once a student has created a collaborative submission, their collaborators can click “continue” and work on the same assignment.
To view student submissions, select the class you want to work in. Student submissions are organized by lesson in the class.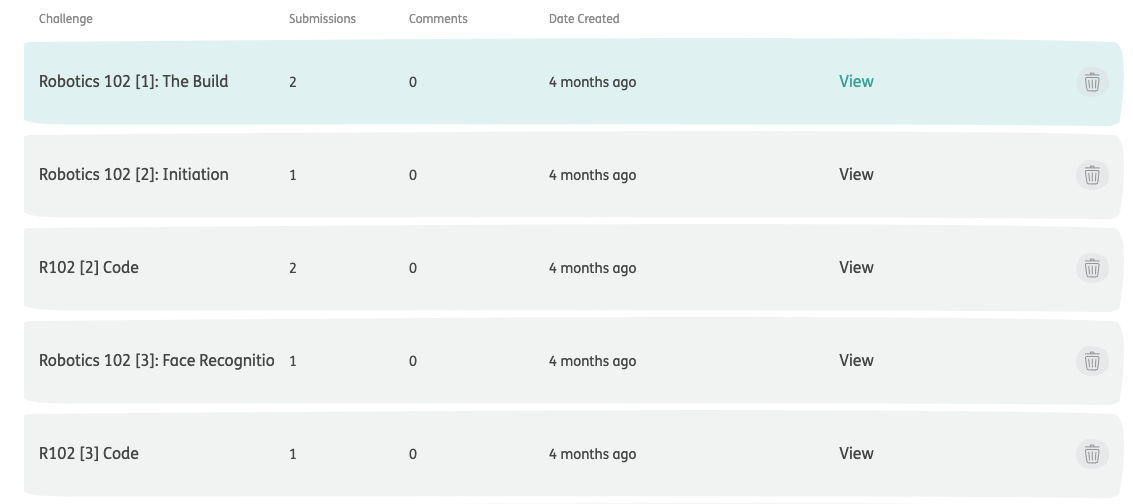
When you click "View" near the title of an assigned piece of content, you'll be taken to a page displaying icons for each created submission. Each icon will display the names of every collaborator working on that submission.
Click on a submission icon to open it. What you see will be very similar to the original assignment. The only difference is that it shows all student work inside any fields that request an interaction from the student/ group. When code is written or modified, you’ll see what they wrote. If students are required to answer a question, you’ll see their response.
One benefit to Further is that You can edit any of our challenges. Sections and tasks can be removed or more can be added, depending on your classroom needs. There are also options to add new text, images, videos, questions, etc.
To edit a challenge, open it and look for the options next to the three line icon in the top right corner. Click on the pencil to initiate edit mode.
If you are editing a piece of our original content, Further will make a duplicate of the material. This will allow you to have your version and still access the original as well.
Editing content is pretty easy. To edit most text, just click on it. When you hover over any of the content you will be given more options. If you want to delete something, hover over it until you see the trash can icon. To rearrange the content, hover over the box you want to move until the cursor turns into a hand. When that happens, you can drag and rearrange those elements.
Content on Further is arranged into three major areas:
At the top of a content page you will find the title section. This includes the content title, description, and header image. These three things also appear on the content icon card that appears in the My Challenges page of Further.
Below the title section you will find two columns, let’s review the left side. The left column is typically used for displaying instructions and providing directions. This spans from below the title section all the way through to the end of the challenge. When we want to give students directions, questions, or informational material, it usually will be placed on this side of the challenge. Content in this column is broken down into “sections,” which are made up of “tasks.” Supplemental content, like images, videos, or code for the students to try will all appear in the final content area: the right column.
As users scroll down the page, new media appears in the right column, based on what task is being highlighted in the left column. For instance, If the left column is explaining that the user should connect a red LED to port D3, the right column provides an illustration showing the LED and the port.
Creating challenges allows you to make customized content for your students. The process begins with navigating to the My Challenges page.
-
- Click the My Challenges tab at the top of the Further website. If you’ve not created any content yet, this page will be empty.
- Near the top, you will find a gray button marked with a + symbol. Click on this icon to create a new lesson.
- Similar to the process of creating a class, the first step is to name the content. If you haven’t fully decided on a name, you have the ability to rename the lesson at any time.
- After assigning a name, click “Create”.
- Now you’re editing a blank Challenge. You are given the option to add a description and an image inside of the title section. Then it is time to start building out the content within the left and right columns.
We recommend starting with the left column, since all of the content in the right column is anchored to sections.
Another content feature in Further are the courses we offer. Courses are used to organize content so that users know which challenge to start with, and where to go next. Think of them as a unit, where lessons are arranged in a specific order in which students should progress through. They will build their knowledge of the concepts through hands-on learning. Here is an example of the Robotics 101 course that you can find on Further.
The great thing about courses is that they can be added to classes and you can even create your own. If you know that every year you’ll have a class of students doing the same four challenges, you can put those challenges into a custom course. Then, you can assign the course to each new class you make instead of manually adding the challenges every school year. What a life saver!
The process of creating is course is very much like creating a new challenge.
- Navigate to the “My Challenges” page.
- Click the “+” button at the top of the window.
- Select “New Course” and then give it a title.
- To finish the process, click “Create.”
Just like when you are creating classes or challenges, you are able to add a description and cover image. Now you can add challenges to the course. The process to do this is like how content is assigned to a class.
- Find and open the content you want to add to the course.
- Near the top right side click on the button marked with three lines.
- Select “Add to Course”.
Once content is added, you can assign the course to any class by selecting the “Add to Class” option inside of the three line button. This option is only available while you are inside of the course.